Table of Contents
Purifiers are used on-board ships to purify Heavy Fuel oil, Lube Oil, and Diesel oil.
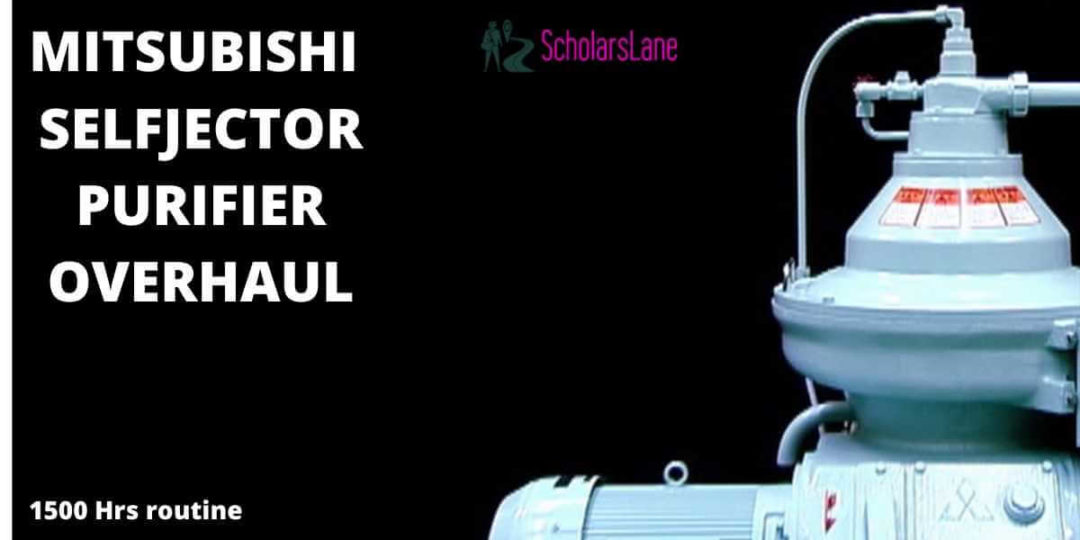
Today I am going to give an insight into overhauling a Mitsubishi Selfjector Purifier in detail.
I am going to share some valuable tips which only come from experience and are not written anywhere in any manual.
Let’s directly jump into the Overhauling of the fourth engineer’s baby on-board ship.
How to proceed into the process of overhauling a Purifier
- If you are going to do planned maintenance, then my first recommendation will be to read the respective Maintenance manual thoroughly two days before the day of overhauling.
- If you got any doubts regarding anything, don’t hesitate to ask your seniors as they are always there to help you out.
- A day before the overhauling day, prepare all the tools required to overhaul the purifier before knocking off. This will save a lot of time during the actual scenario, as you are not running around here and there at the time of action.
- A night before the overhauling day, just go through the maintenance manual of the purifier once again to get more confidence.
- After reading the manual once again and before going for sleep, just close your eyes and try to imagine all the parts of the purifier in the sequence of disassembling and assembling procedures.
Safety procedures to be followed before overhauling a Mitsubishi Selfjector Purifier
- A toolbox meeting should be carried out, and all the plans should be discussed, Manpower, if required, should be asked.
- Work Permits and other logbook entries should be done as per your company policy.
- Proper PPE should be taken as per the requirements.
- Purifier to be desludged 3-4 times and then finally stopped.
- The main breaker should be switched off, locked, and tagged out with a clear message “MEN AT WORK.”
- Electrical connections to the Purifier Motor should be disconnected by a qualified Electrical Officer.
- Purifier should stop rotating before starting any maintenance on it.
So now, the purifier is completely stopped, and we can start disassembling it.
Disassembling Procedure of Mitsubishi Selfjector Purifier
- Take an empty Bucket or Tray and remove the plug mounted in the lateral direction of the bracket to remove the oil from inside the piping.
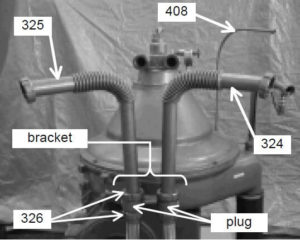
- Remove the cap nuts of the connecting pipes and connecting tube with the Hook spanner, and side by side also loosen the bottom union nuts and direct both the pipes sideways, make sure to block both the pipes with rags to prevent oil dripping on the floor.
- Before removing the Flow rate regulating orifice, keep a piece of rag in your hand to block the oil coming out of the space.
- Remove the sealing water pipe and other connections from the COVER.
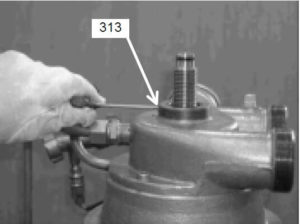
- Remove the nut tightening the inlet pipe using a spanner.
- Now remove the socket head screw to free up the inlet pipe and make sure you keep the socket set screw in place only to avoid the unnecessary loss of the screw.
- Now lightly strike on the top of the inlet pipe with a mallet to detach the tightly held taper portion.
- After this step, remove the socket cap screws locking the frame and the sludge cover.
Note: I highly recommend keeping all the disassembled parts in a separate tray to avoid loss.
- Now remove the sludge cover using the special tool and a chain block.
- For removing the Gravity Disc, mount the disk nut handle on the disc nut and strike it with a hammer in the counter-clockwise direction to remove it.
- Now remove the heavy liquid chamber, Impeller (2), packing, and gravity disc.
- Now remove the light liquid chamber using its special tool and remove Impeller (1), inlet pipe.
- Now remove the cap nut using the special tool.
- Now mount the jack into the threaded portion of the distributor and turn down the handle of the jack until the bowl is slightly raised.
Note: Many of us make a simple mistake in the previous step. What we generally do is, we turn the jack until it becomes hard to turn further, but until now, the bowl has not jacked up.
So, it would help if you used a hammer and jack it even more until the bowl feels to be totally free from the vertical shaft.
- Now mount the shackle to the handle of the jack and slowly lift up the bowl using a chain block.
- Now place the bowl on the dismantling stand and make sure that the 3 pins of the stand fit in the holes at the bottom of the bowl.
- Now we need to remove the bowl nut, and this can be a tedious task.
Note: If you dismantle the purifier after waiting for it to become cool, then the previous step will become very difficult as the sludge becomes hard on cooling.
- I recommend opening the lock nut when the bowl is hot.
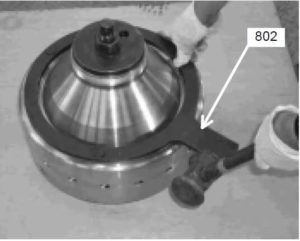
- Now compress the disk stack using the special tool and hammering in the clockwise direction. I recommend using a hammering spanner for compressing the disk stack.
- Now remove the bowl nut by hammering it in a counter-clockwise direction.
- To remove BOWL HOOD, place a protective plate on the top of the distributor, place the jack, lock it with the disc nut, and turn the push rod of the jack to raise the bowl hood.
- Lift the bowl hood with a chain block and place it on a rubber mat or some soft surface so that the sealing surface will not get damaged.
- Then remove the upper disc and the complete distributor using the required tool.
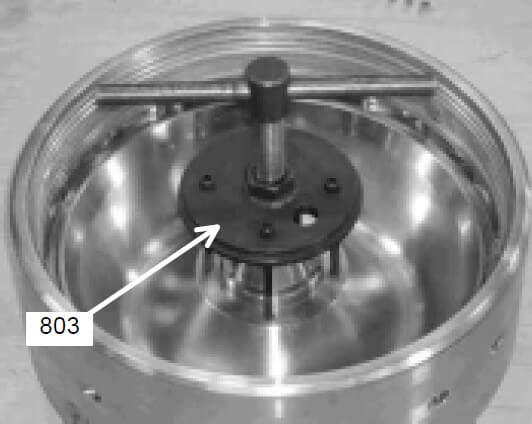
- Now to remove the main cylinder, place the protective plate and jack (1), then strike the jack evenly all around with a rod to raise the main cylinder.
Note– many times, removing the main cylinder is not so easy as it sounds, sometimes it gets stuck, and if extra force is applied in the stuck condition, it may result in the damage of the tools or even the main cylinder.
Recommendation: Take a brass or Teflon rod and hit slightly in all the directions of the main cylinder to loosen it, to be very specific, just take a closer look on the main cylinder, you will notice that it is coming out slightly more from one side than the other.
Now hit with the rod on that side, which is coming out more to balance the main cylinder, keep jacking with the tool, and very soon, the main cylinder will come up.
- Now the next step is to take out the Pilot Valve.
Note: before using a hexagonal rod spanner to remove the valve nut, I recommend hitting the valve nut with a brass rod and hammer to ease it up.
I have experienced it many a time that after hitting the valve nut with brass rod and hammer, it comes out pretty quickly without having the risk of any damage to Allen key.
- Now remove the pilot valve with the special tool.
With this, we have completed the disassembly of the Purifier bowl.
Now clean, inspect, and change the parts, specially O-rings and main sealing ring and assemble the bowl in the reverse order.
Tips for Assembling the Purifier Bowl
- Apply Vaseline on all the O-rings before assembling.
- Clear all the holes in the bowl and pilot valve with compressed air.
- Apply Lube oil to the sides of the bowl and main cylinder before putting it back.
- While putting back the distributor, match the hole with the bowl and reconfirm this by rotating the distributor. You should feel it stuck in the hole.
- Apply molykote on the bowl lock nut and in the thread of the bowl to prevent seizure.
- Match the 0 marking on the bowl body and lock nut.
- Apply lube oil on the top portion of the vertical shaft on which bowl is going to sit.
- After placing the bowl back on the vertical shaft, don’t forget to tighten the cap nut; otherwise, major accidents can happen.
- Now mount the inlet pipe, Impeller (1), light liquid chamber, and other parts following the sequence given in the manual.
- Don’t forget to place the Teflon ring during the assembly.
- After this assembly, place the sludge cover and don’t forget to lock the inlet pipe with a hexagonal head screw.
- Connect all the pipes and fittings to the sludge cover and make it ready for a tryout.
This was all about overhauling the bowl of Mitsubishi Selfjector Purifier.
I hope these tips will provide some value in easing up the process of purifier overhaul.

4 thoughts on “How to Overhaul a Mitsubishi Selfjector Purifier (1500 Hrs)”